Edges
Three depths in one piece: 25 mm, which becomes 20 and 15 mm.
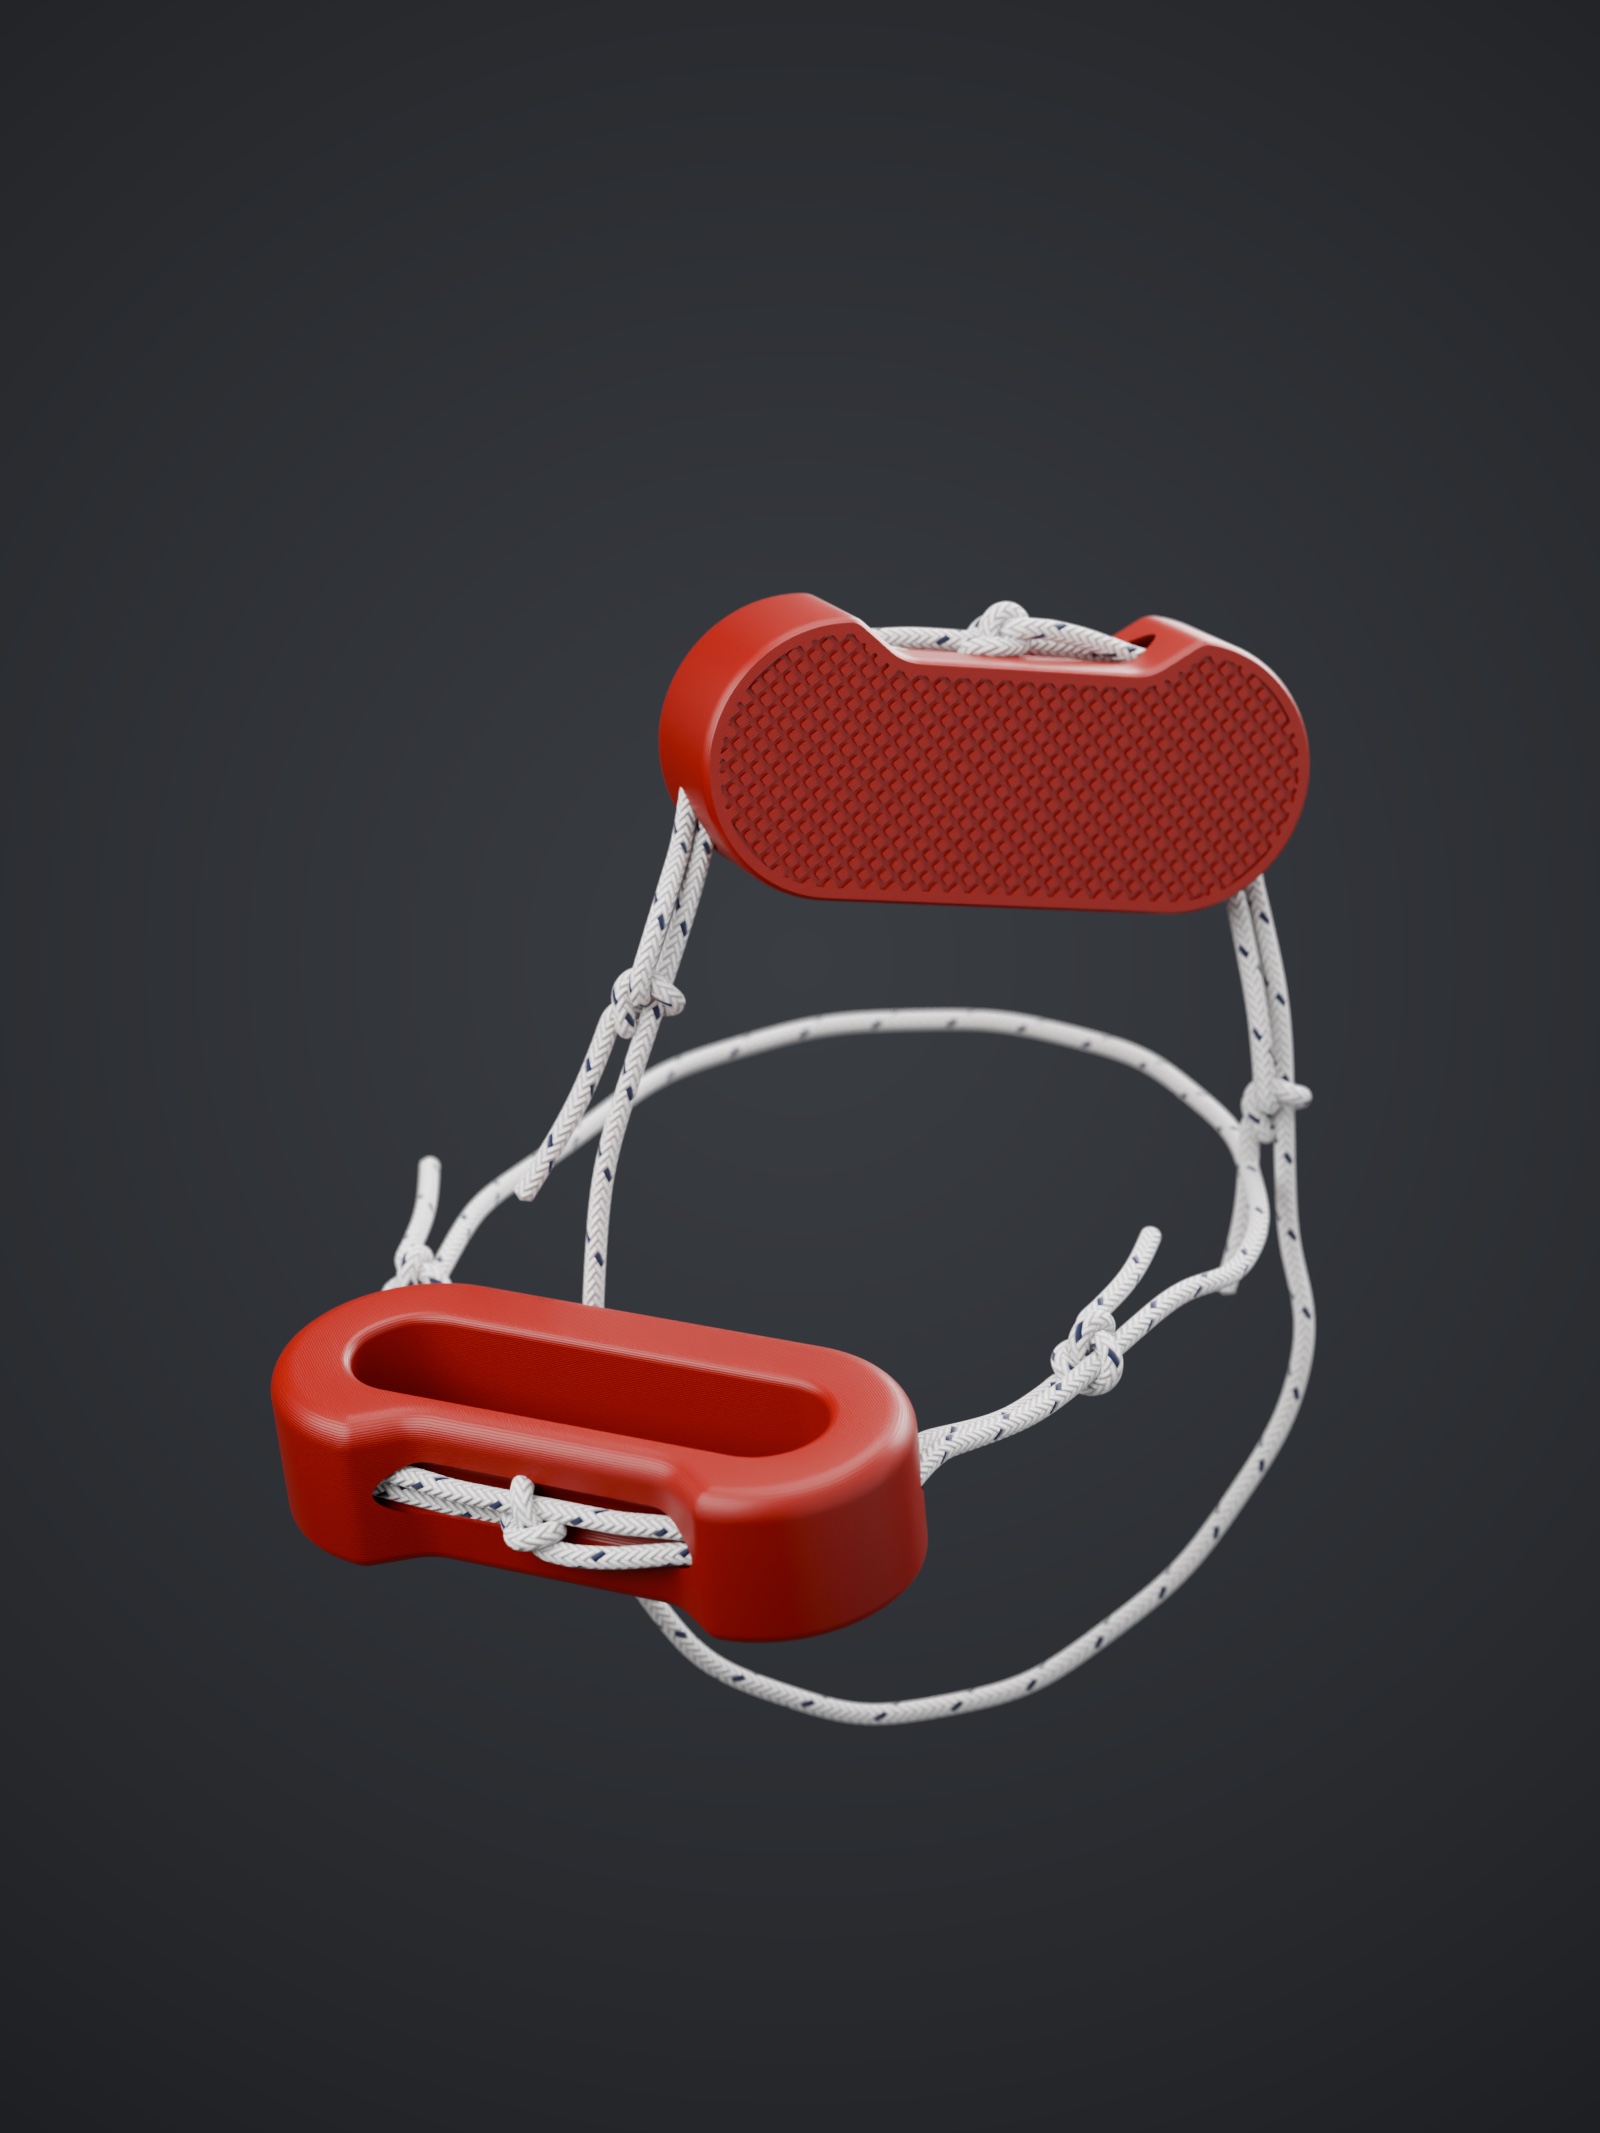
A hangboard you can carry anywhere. One grip, a rope, and your whole finger training goes with you.
 €34.90
The smallest hangboard to take anywhere.
Three depths in one piece: 25 mm, which becomes 20 and 15 mm.
[E.g. hang a weight or use it with a cord: describe how you adjust the intensity.]
One tool, many workouts: use it as a regular hangboard, as a pinch, or as a grip with the weight hanging below.
I built it myself because I didn’t want to carry a ton of gear on holiday. So I made this and took it with me, and I kept training even in regular gyms.
See the specs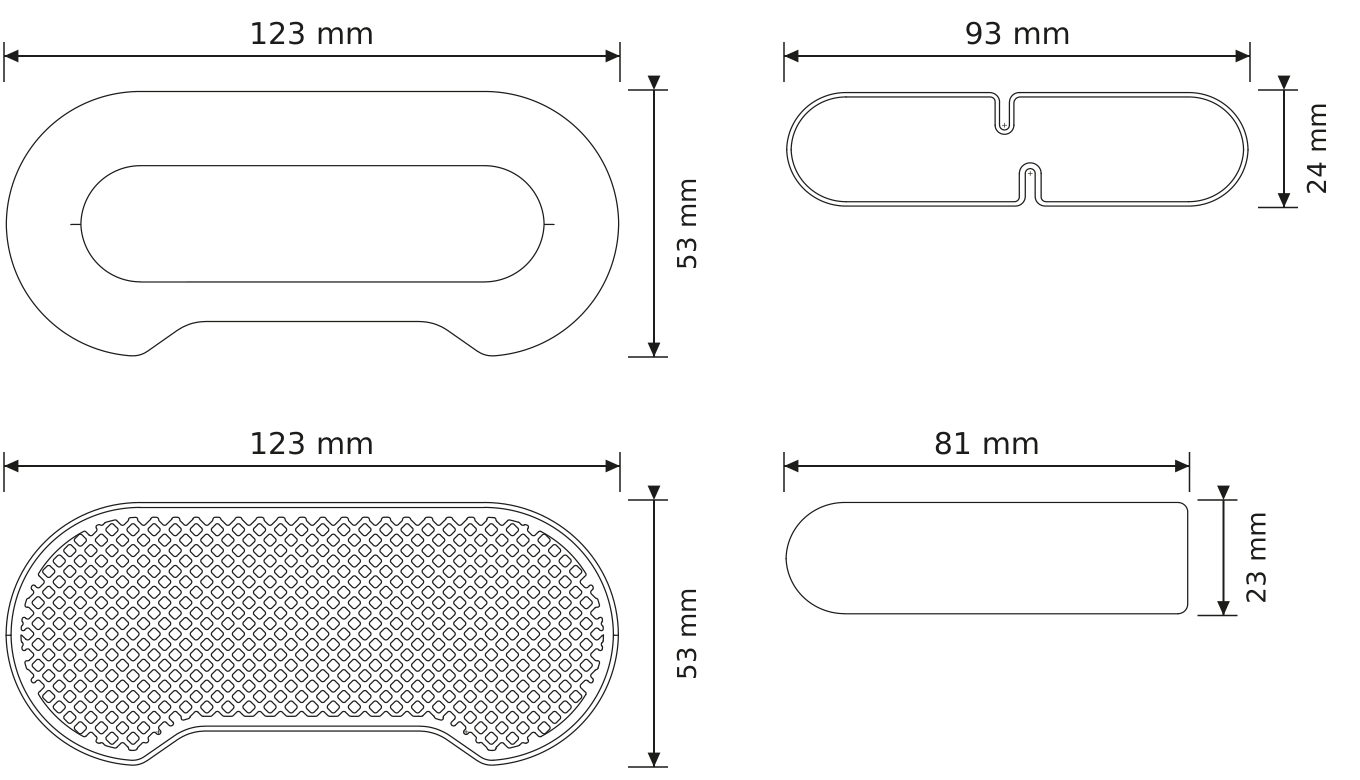
€34.90
Buy now ↗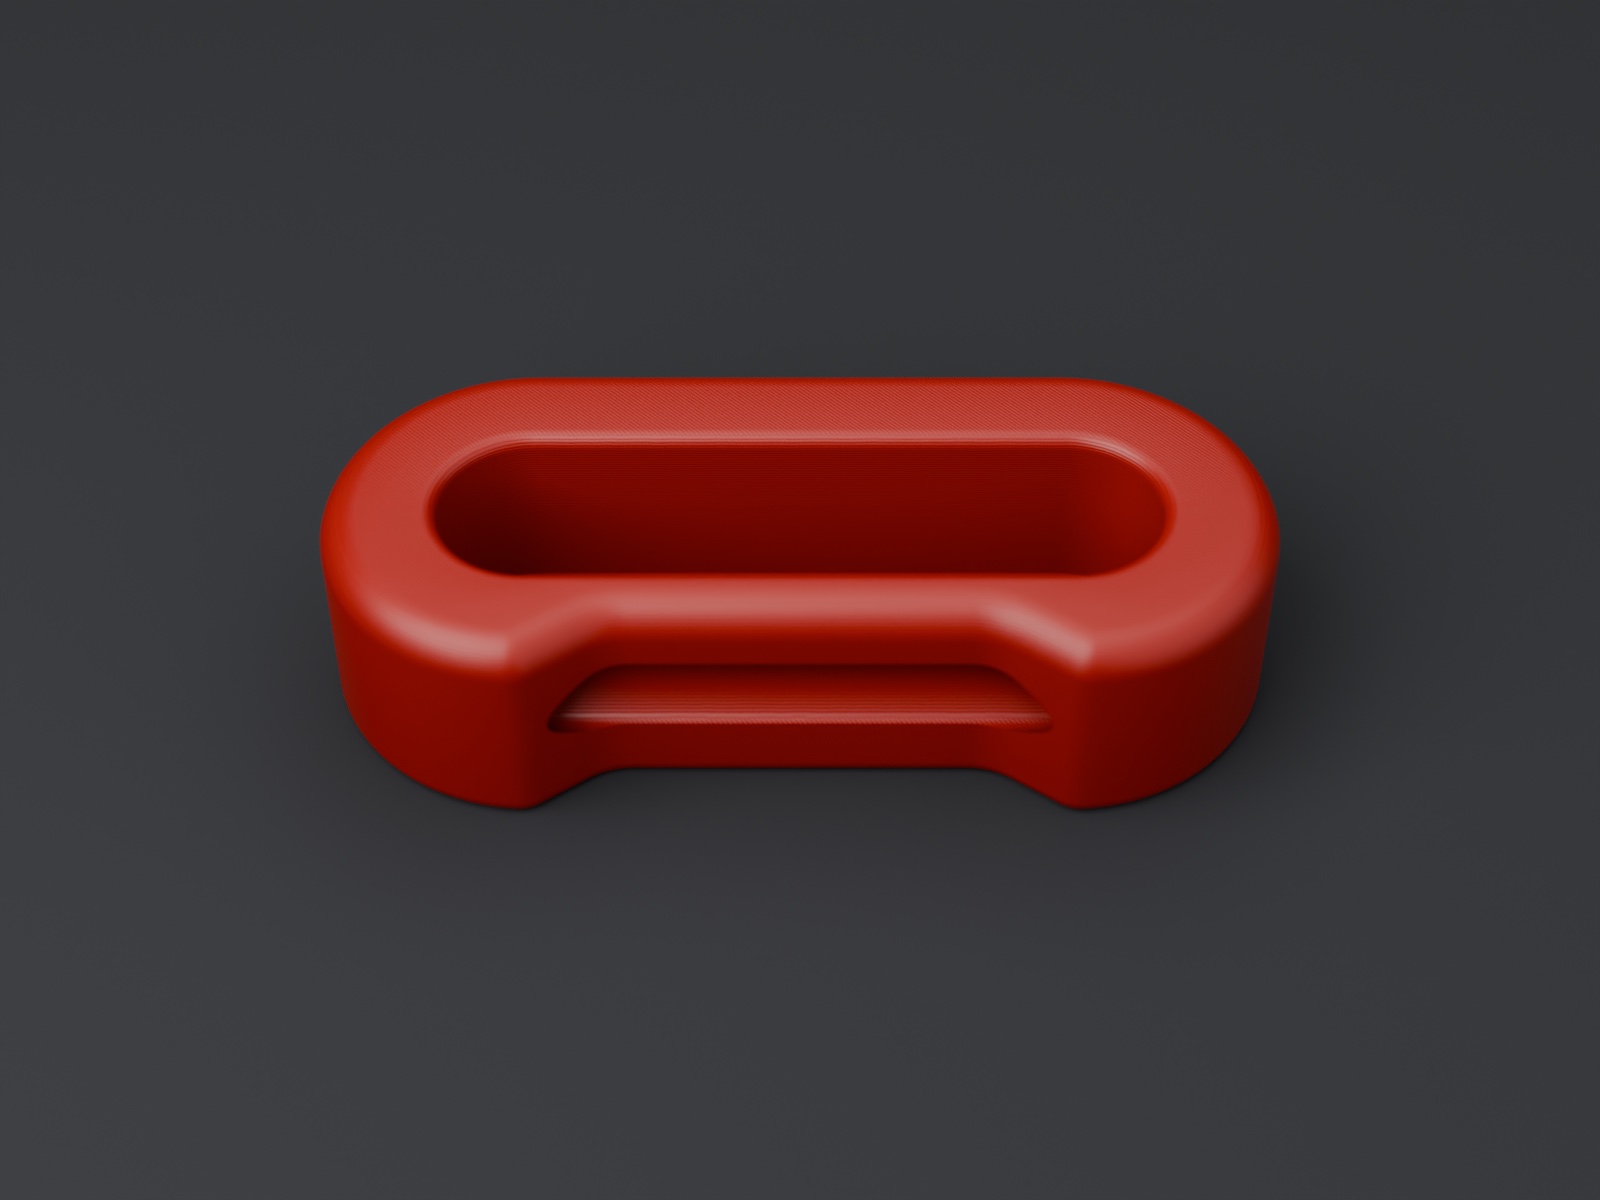
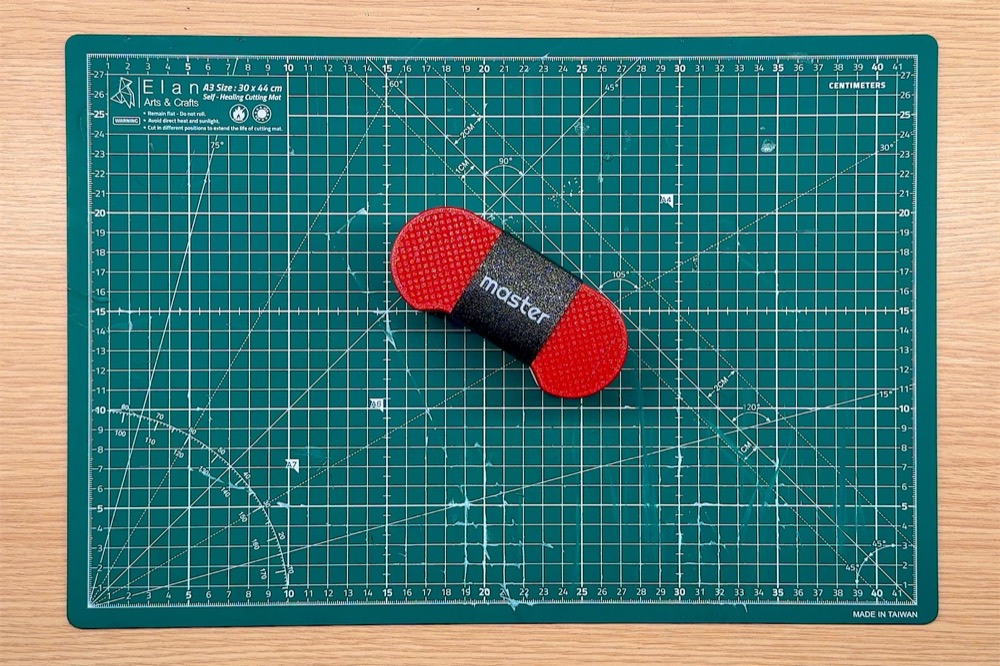
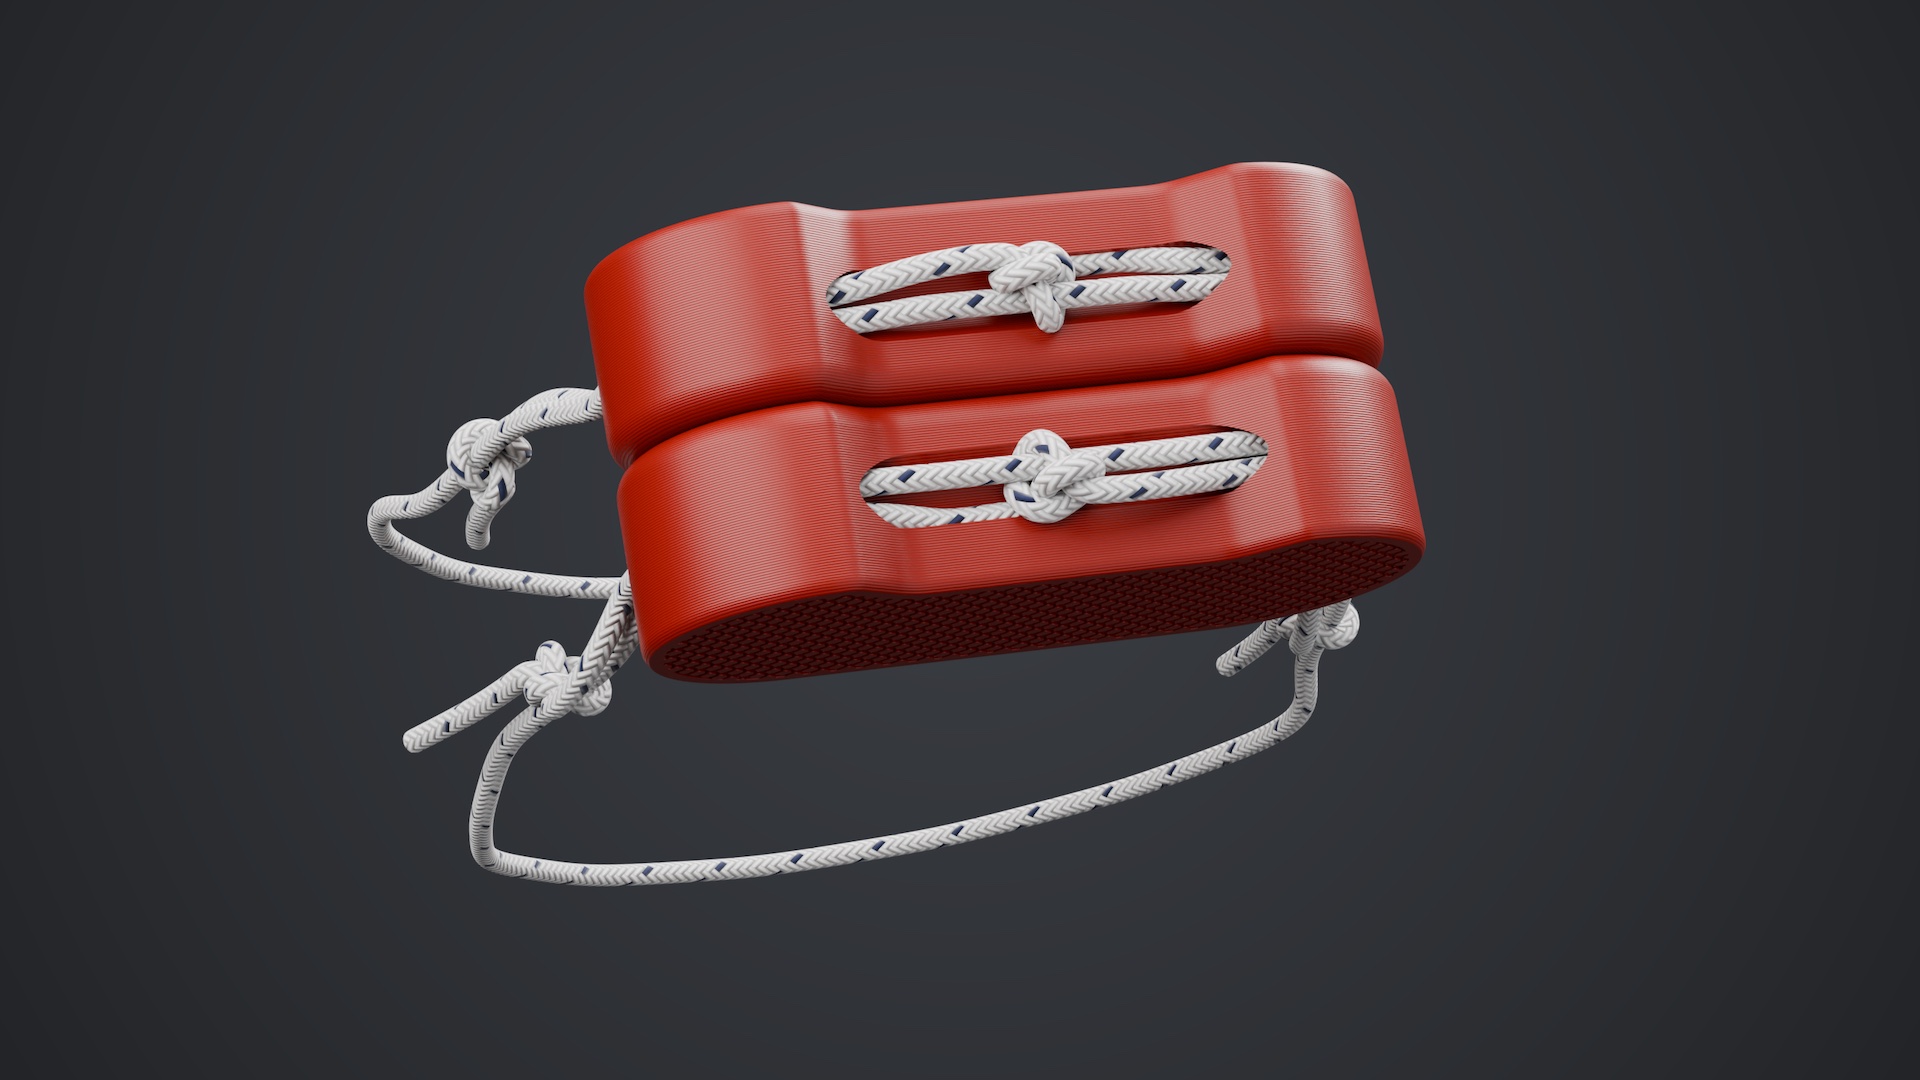
Grip Master comes packed in one compact block, held together by the band. Slide the band off to open it.
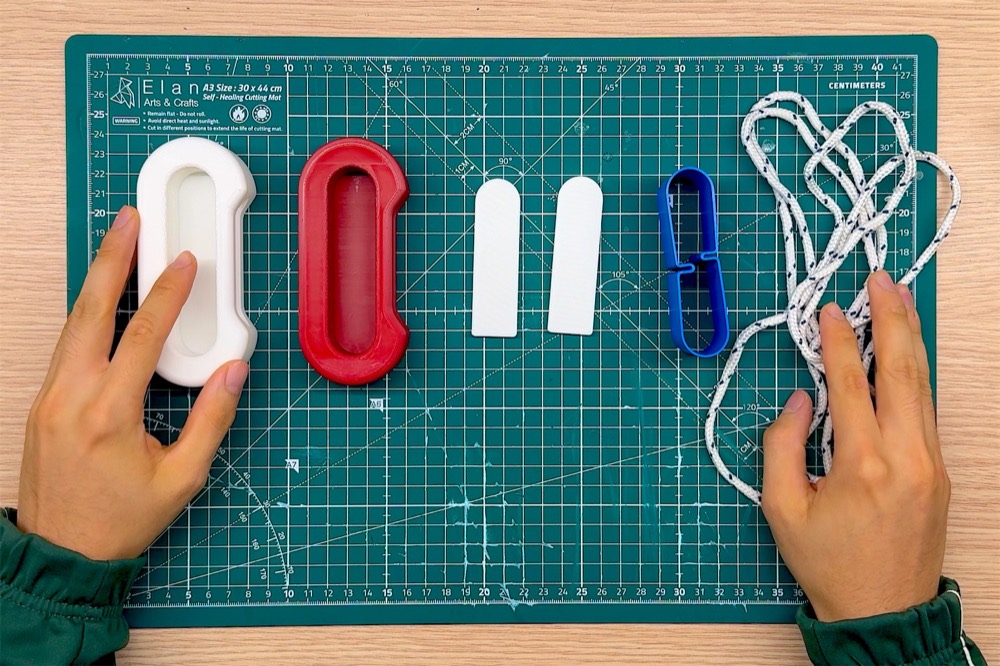
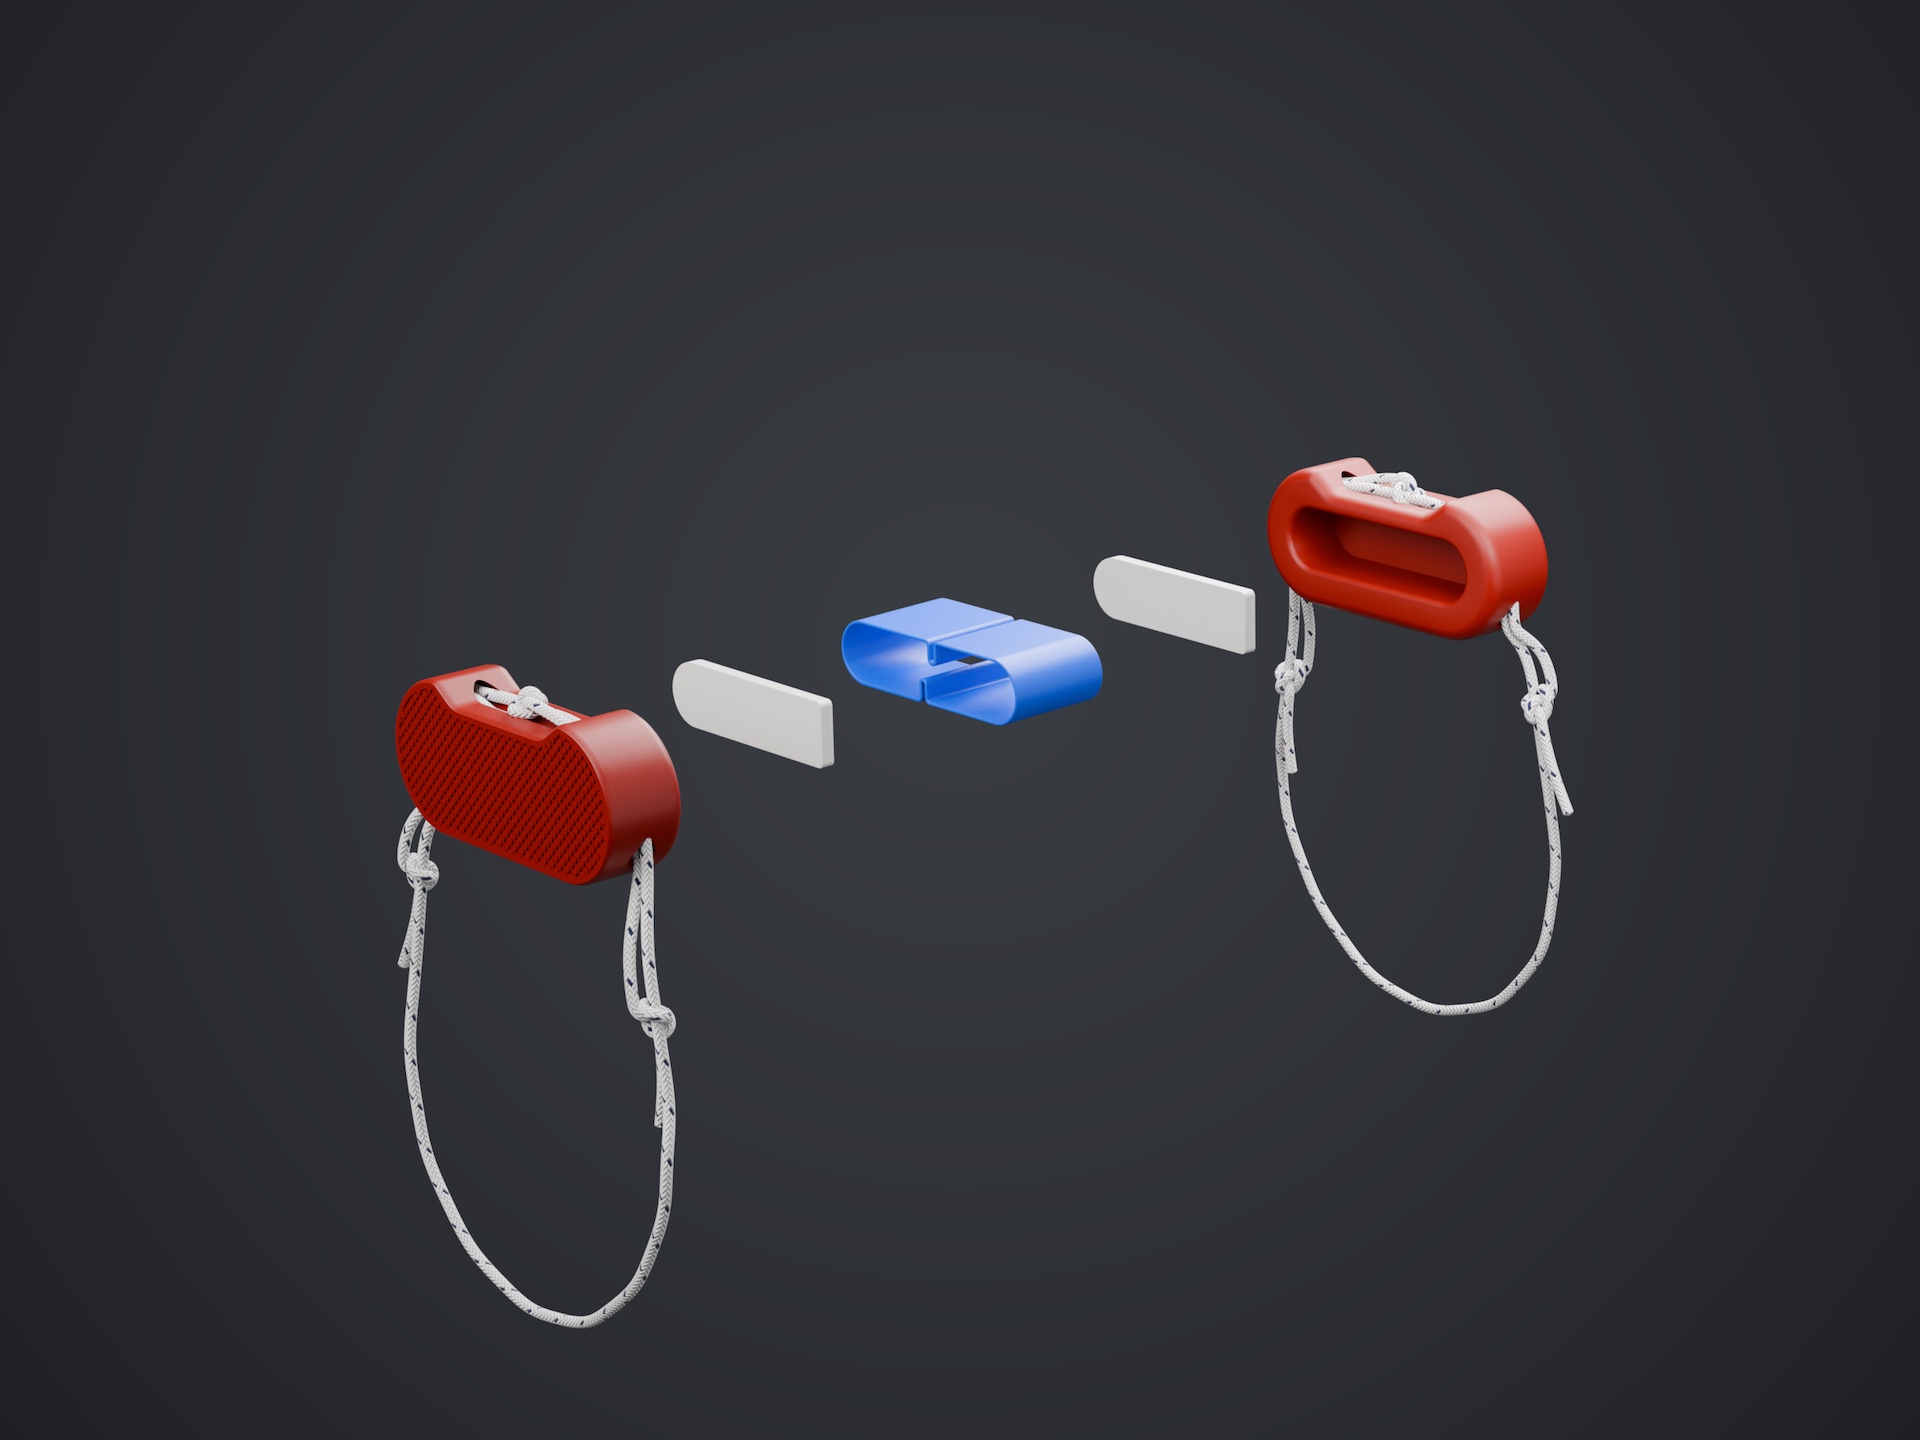
Open the kit and lay out every part: the two holds, the two plates, the connector and the two cords.
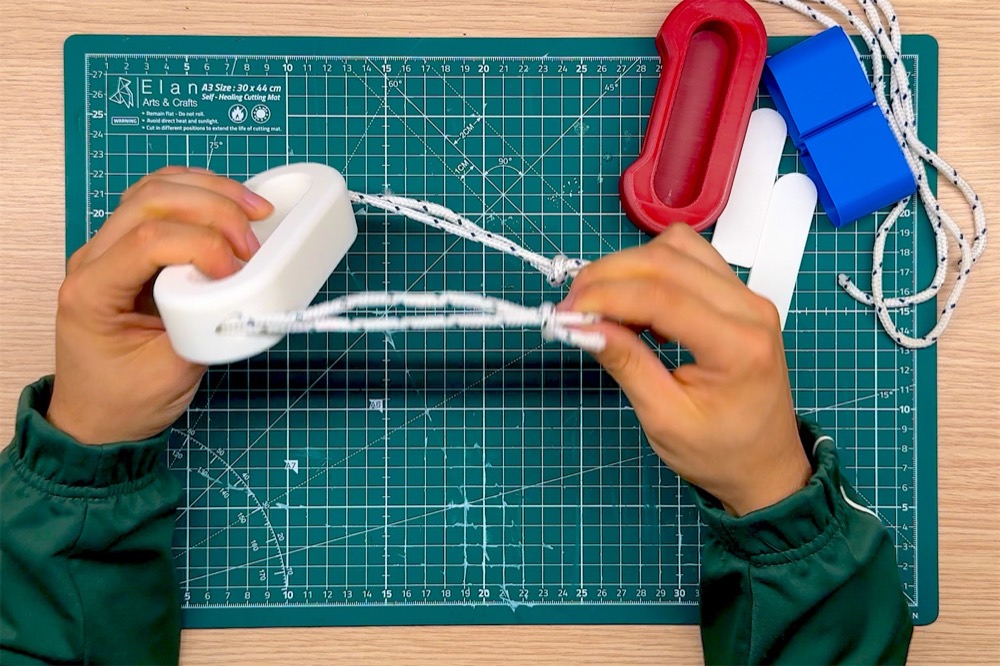
Pass a cord through the slots of one hold, tie it and pull the knots tight. Do the same with the second hold.
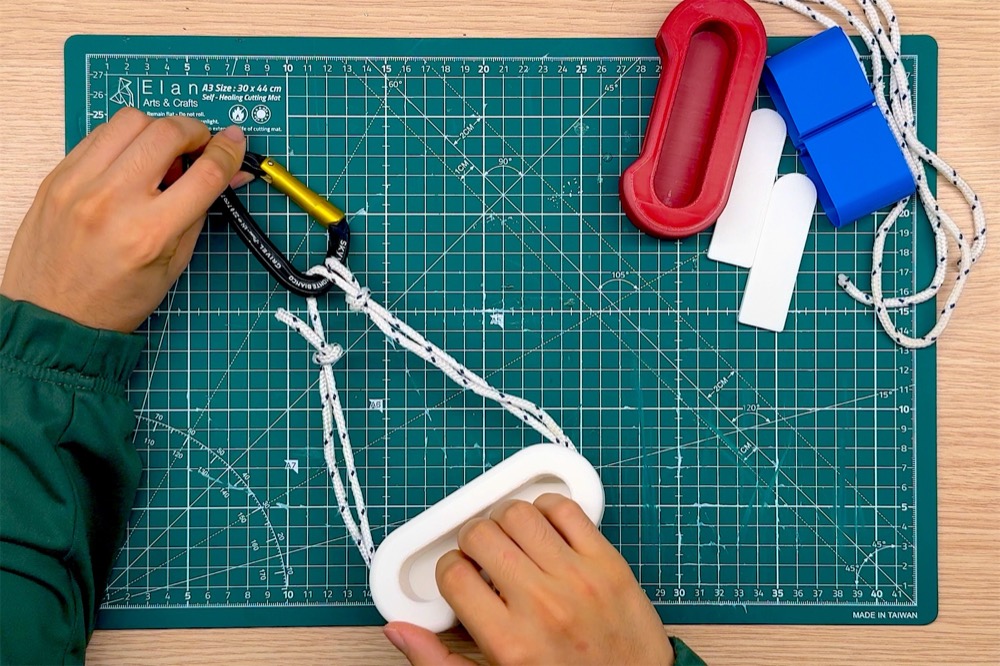
Clip the cord loops of both holds into the carabiner. That’s the point you hang it from, or where you add a weight.
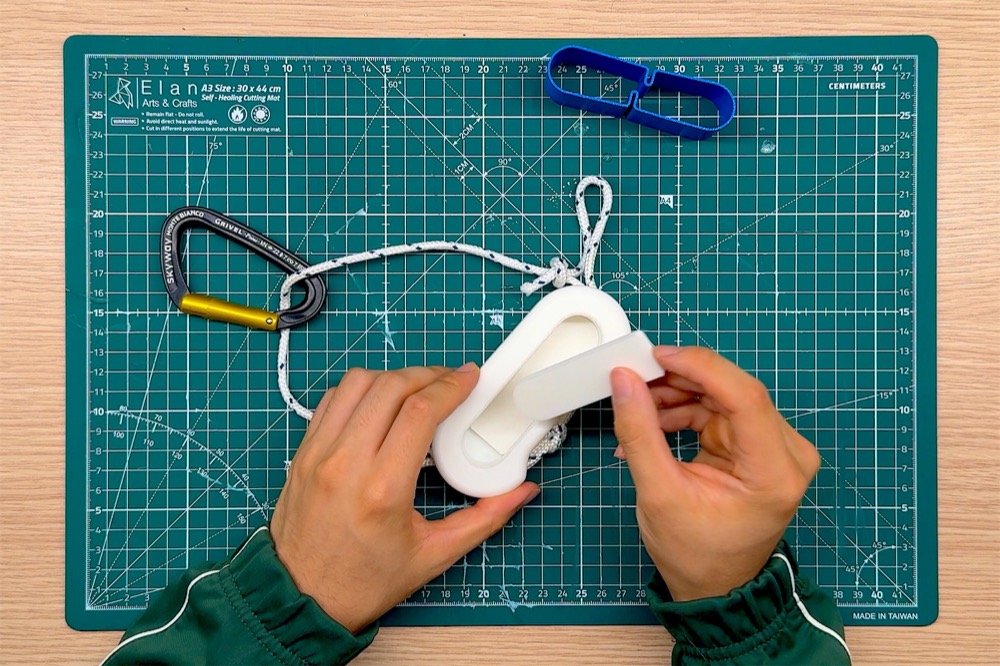
The bare edge is 25 mm. Slot in one plate for 20 mm, two plates for 15 mm.
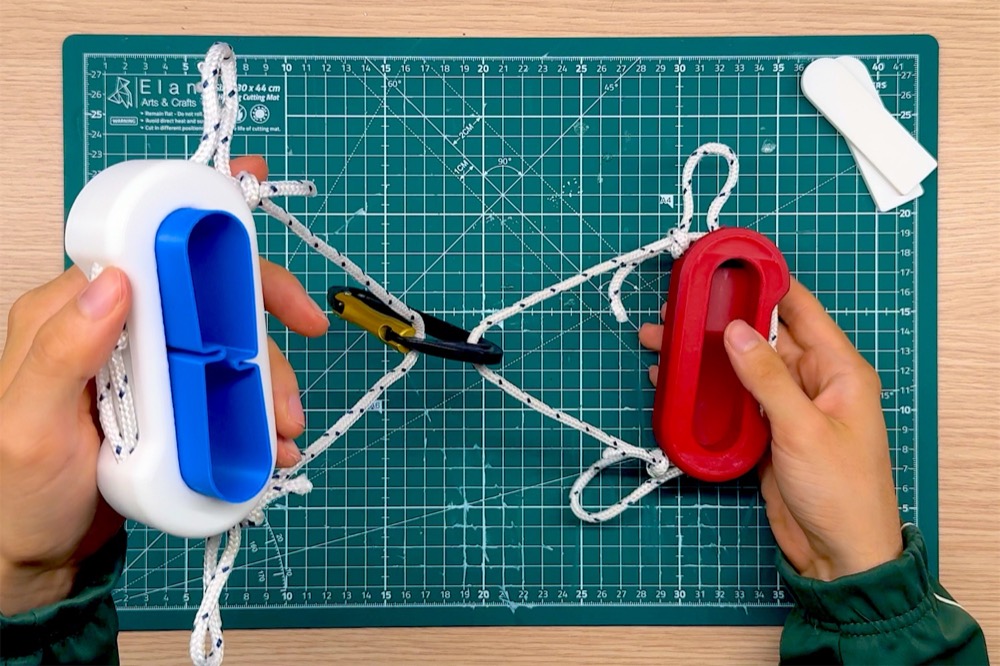
Slide the connector into the holds to join them into a single hangboard. Leave it out to train each hand on its own.
Grip Master is sold on eBay, so payment and buyer protection go through eBay. Go to the listing ↗
The inside of the hold, where your fingers go, is textured to improve the grip, so your fingers don’t slip even when you get tired.
They change the depth of the edge: without plates it’s 25 mm, add one plate for 20 mm, two plates for 15 mm. Smaller edges are harder.
Start with the deepest edge (25 mm) and a light load, then make it harder little by little. Always warm up first.
Yes, it works for beginners too, and that’s exactly why I sell it: it helps you improve really fast, so you train smart instead of just climbing more.
It’s 3D printed in high finish matte PLA.
Sure, email me at [EMAIL]@gmail.com.